
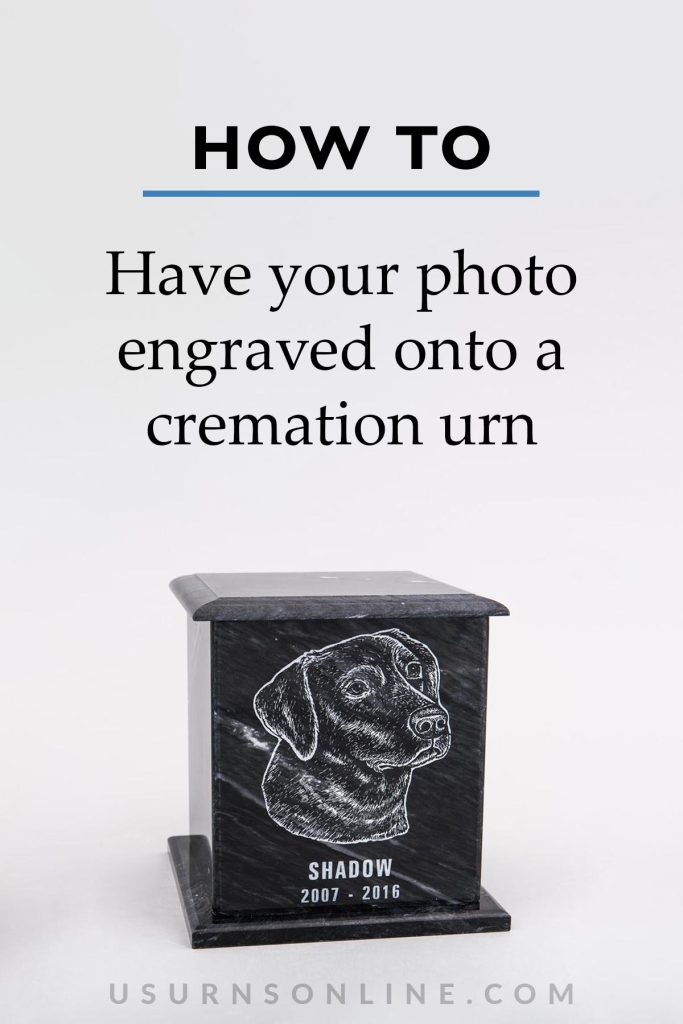
A photo engraved onto a cremation urn is a beautiful tribute to your loved one. We’ve found our photo cremation urns to be among our most popular and cherished memorial urns, preserving a loved one’s character in a special way.
HOW TO GET A PHOTO ENGRAVED ONTO A CREMATION URN
1. Prepare the photograph
You’ll need a good photo that will transfer well onto the cremation urn through the laser engraving process. Here are the steps you should take to prepare the photo.
A. Choose a Favorite High-Quality Photo
For engraving purposes, you’ll want the highest quality photos you have. For your own purposes, you’ll want to use a picture that is meaningful to you. The ideal photo engraved onto a cremation urn will be a combination of both – an image that you love, which is also clear, in focus, features quality lighting, and has your loved one pictured up close.
Here are a few brief examples.
Poor quality photo
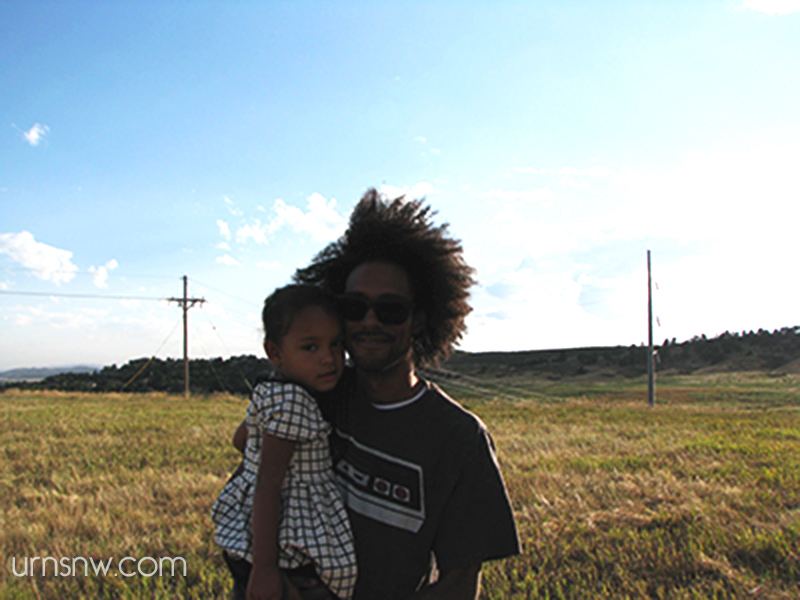
This photo has a low resolution, is pixellated/blurry, and the subjects’ features are indistinguishable against the contrast of the overexposed background. Additionally, the subjects only take up a small portion of the entire photo, so it would need to be cropped down, further reducing quality. This photo would not be ideal for engraving onto a cremation urn.
Acceptable quality photo
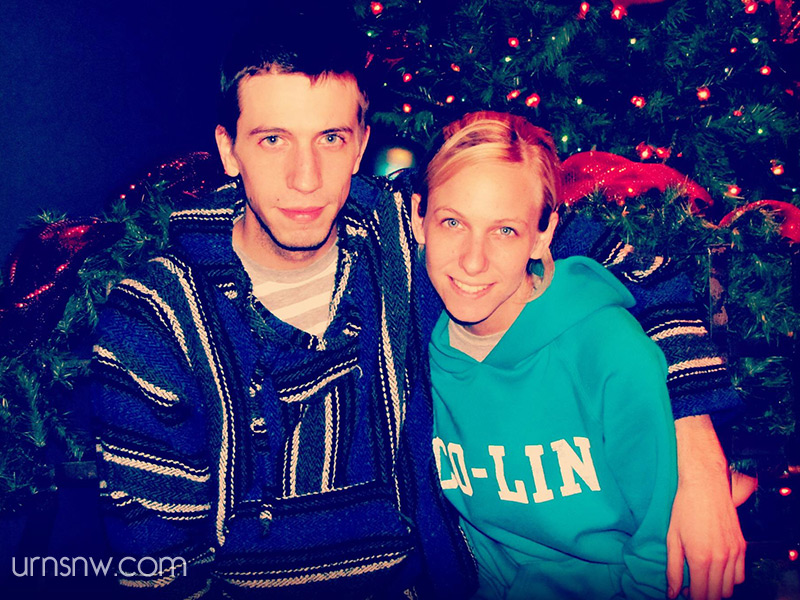
In this image, the subjects are clear and brightly lit. The image quality is similar to that of a point-and-shoot or cell phone camera; not professional quality, but everything is in focus and detail is clearly visible. Cropping would be minimal, since the subjects take up much of the photo. The engraving results wouldn’t be perfect (but isn’t that is how life truly is?), however, the final product would look very nice.
Good quality photo
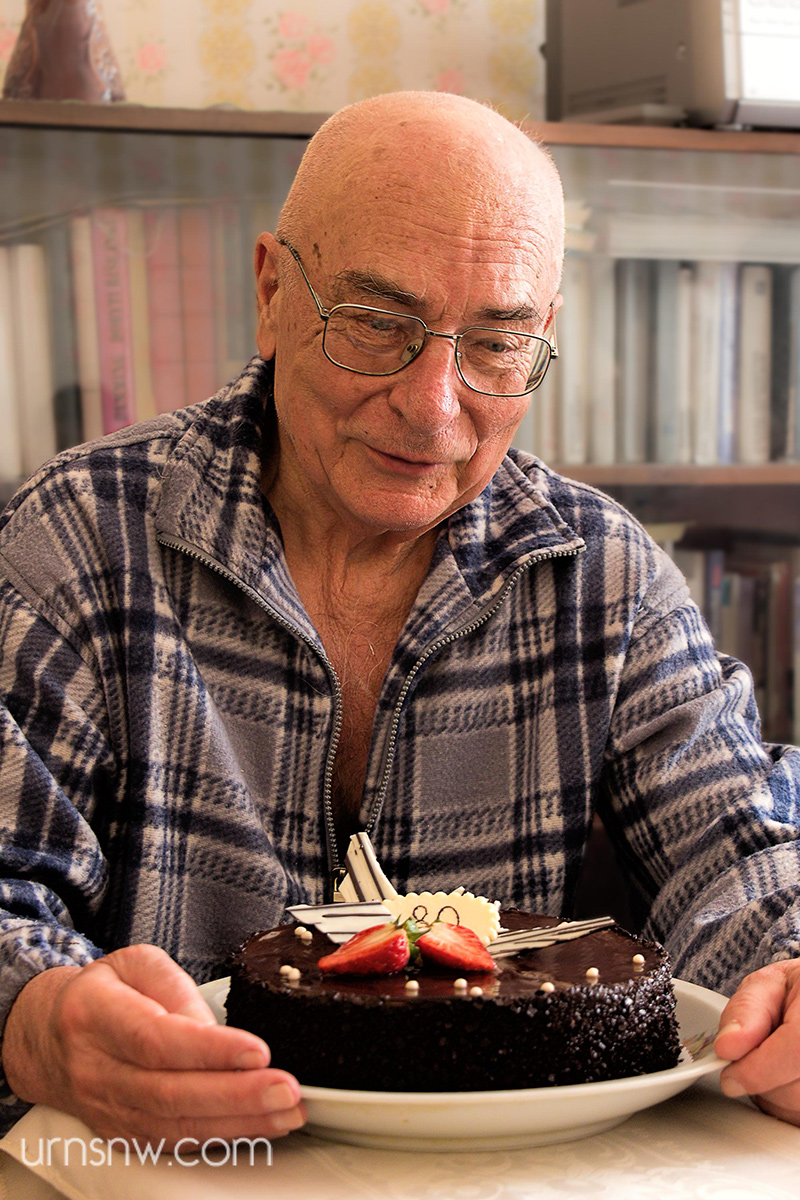
This is an ideal photo for engraving onto a cremation urn. The subject is clear, detailed, well-lit, and takes up most of the image. Cropping would be minimal. The image resolution is large, and the subject would be easy to crop out and engrave. This would result in a beautiful engraved photo urn.
Urns Made in the USA
-
 Angel Wooden Cremation Urn with Carved DetailsPrice range: $209.00 through $409.00
 -
Product on sale
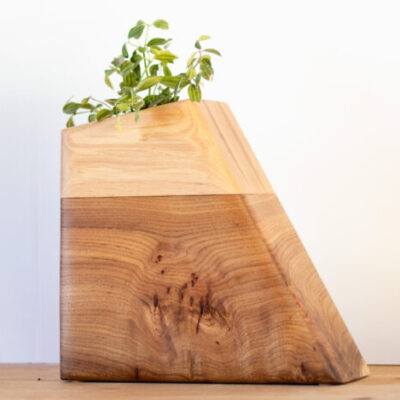 Large Planturn Cremation Urn in Elm & HickoryOriginal price was: $625.00.$562.50Current price is: $562.50.
B. Save the Image File
For a printed photograph:
Scan the print into your computer using a scanner, or, if you don’t have access to a scanner, take the printed photo down to a local copy shop to have them do it for you. We accept photos in PSD (Photoshop), PDF (Adobe Acrobat), or JPG (the most common image file format). Resolution should be as large as you have available; do not modify, enlarge, or alter the photo in any way for best results.
For an image file:
We accept images in the following formats: PSD (Photoshop), PDF (Adobe Acrobat), or JPG (the most common image file format). If your image is in a different format, such as TIF or GIF, or if you’re just unsure about whether the photo will work for engraving, feel free to email it to us and we’ll let you know. Do not alter the photo in any way, as this lessens the quality.
Many people will choose a favorite profile image from social media such as Facebook, Twitter, Instagram, or other services. Avoid saving the person’s thumbnail profile image, as that will be a smaller version of the photo you’re looking to use. For Facebook (other sites may be different), you’ll need to click on the profile image until it looks large on your screen, then you can right-click and save the file.
2. Choose the Cremation Urn
There are several types of cremation urns that will work well for engraving a photograph. We’ve found that maple wood, alder wood, and black cultured granite work the best.
A. Maple Wood Photo Engraved Cremation Urn
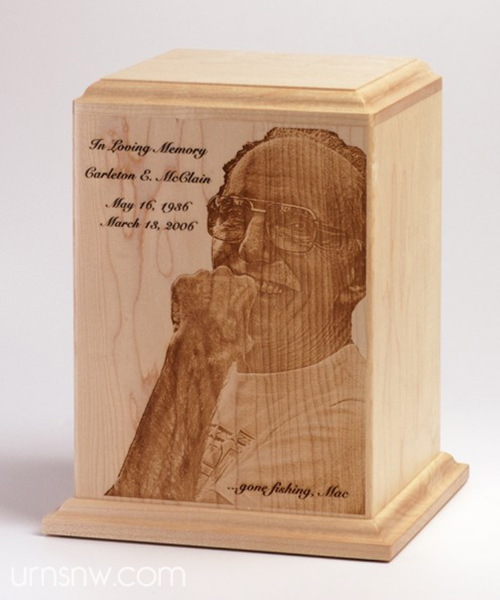
This engraved photo cremation urn is made in the USA from premium white maple wood and is our most popular engraved photo urn. This item includes a brief inscription of name and dates, engraving of the photo, and (depending on the photo and your request) we’ll even edit out the background to highlight the individual.
B. Engraved Photo Urn in Black Granite
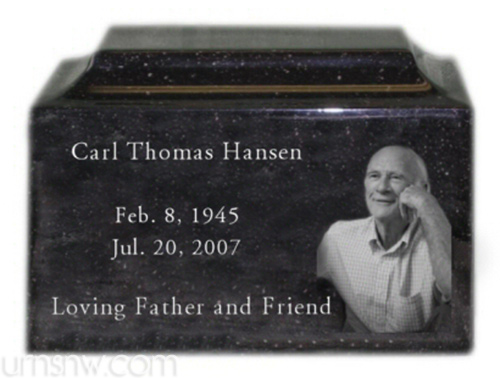
Crafted in the USA from premium cultured black granite, this elegant cremation urn presents the ideal canvas for engraving a photo of your loved one in fine detail. The black simulated granite surface reveals a brilliant white when engraved. This memorial includes name, dates, and brief inscription as well. The bottom opening stopper allows the urn to be easily sealed, and this durable urn is suitable for display on the mantle or for burial in the cemetery.
The cultured granite photo urn is also available in companion size (for two people). See it here.
C. Vision Engraved Photo Cremation urn
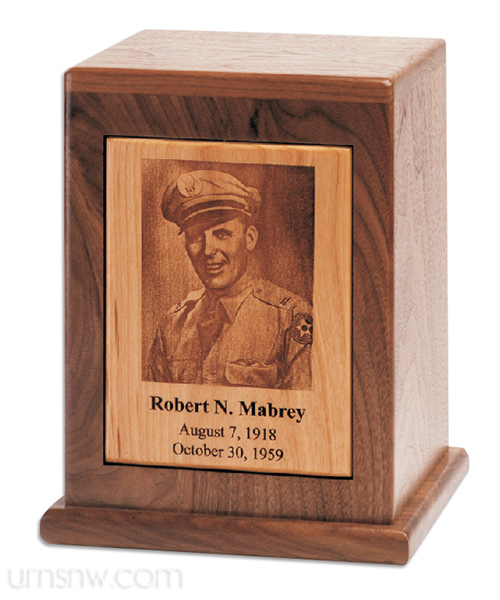
Shown above in dark walnut wood with an alder wood inlay panel, the Vision Engraved Photo Cremation Urn is also available in oak wood with an inlay of maple. Each panel (light reddish-yellow alder or white maple) receives the laser etching of the image in exquisite detail. The urn is available in “vertical” orientation for a portrait photo as shown above, or in “horizontal” orientation for a landscape image. Crafted in the USA and individually set up and laser engraved by professionals, this photo memorial is a work of art.
D. Maple Wood Engraved Photo Pet Urn
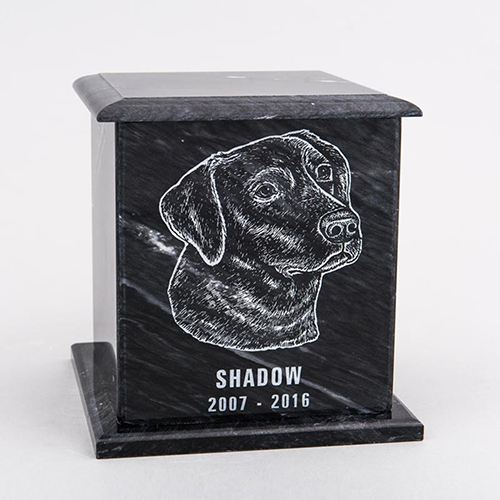
We also offer a complete line of wooden photo engraved pet urns in various sizes to suit your beloved friend. These are American-made pet memorials crafted from premium materials, available in maple or alder and beautifully engraved. Here are the sizes available:
Related: Pet Cremation Urns and Cost
3. Order the Engraved Photo Urn
A. On the Web
Click any of the links above (or see all photo engraved urns here), and take a few minutes verify the details and price of the urn on the product page by checking the product images and description. Then upload your photo to be engraved into the file upload box, enter the personalization info, and follow the simple checkout process. We’ll email you confirmation of the order. Allow 2-5 business days for production, then you’ll receive another email indicating that the order has shipped.
B. On the Phone
If you prefer to talk to someone in person, contact us and we’ll answer any questions or even help you with the order over the phone. We answer the phones Monday-Friday daytime hours Pacific time. If you have any questions, just ask!
4. Put the Cremated Remains Into the Urn
You can do this yourself, or in most cases you can ask the funeral director you worked with to do it for you. If you’re going to do it youself, here is how.
A. Filling a Wood Cremation Urn
Wood urns open very simply. Just remove the screws holding the bottom panel in place, place the plastic bag holding the remains into the urn, and re-attach the wooden urn base. No need for sealant, as the plastic bag will ensure that the remains are secure.
For more information on how to open an urn, check out this guide.
B. Filling a Granite Cremation Urn
Our cultured granite and marble urns have a threaded stopper. Remove the stopper, pour the remains inside (a funnel may be helpful), and then replace the stopper. We recommend using plumber’s tape on the threads to ensure a tight seal. If you’re certain the urn will never be opened, you can use a liquid sealant such as silicone or glue.
For more information on how to open an urn, check out this guide.
5. Display the Urn in Honor of Your Loved One
Our engraved photo urns are perfect for display. We strive for the highest levels of beauty and craftsmanship in the products we offer, and we believe that our engraved photo cremation urns will honor the memory of your loved one wherever you choose to display the memorial.
Read Next: Every Type of Urn You Can Use
Can I have my sons pic of him his dog treeing a coon he was a state champ and it was his love of his life
Hi Rena,
Yes, you certainly can! Just email us the photo, or upload it in the file box when ordering the urn.
Thank you,
Daniel
Can you have a drawing that my son did put on a urn
Hi Teresa,
Yes, see here: https://urnsnw.com/engraved-photo-urns/